Summary
– Step 1: Take the measurements of the future formwork
– Step 2: Install the support cleats
– Step 3: Cut out the formwork boards
– Step 4: Screw the formwork boards together to hide the pipes.
– Step 5: Make the finishes
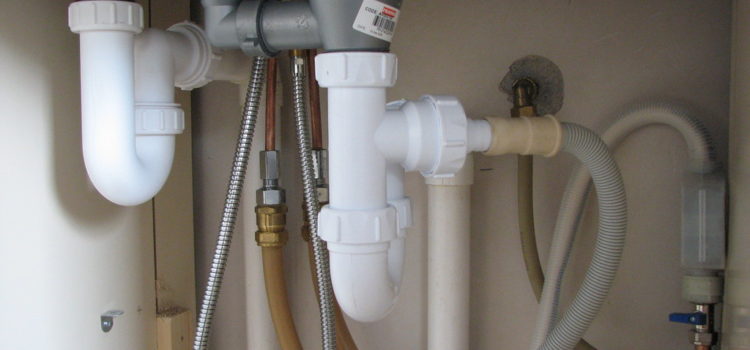
Exposed pipes can be unsightly in a living room or hallway. There are several solutions for hiding pipes: you can hide them with chutes and cornices or make a formwork out of wood plank, plywood, or MDF (fibreboard). To hide lines aesthetically and effectively, follow this guide.
Step 1. Take the measurements of the future formwork
The formwork consists of two panels that you will assemble face to face.
– Take the measurements of the site to be formed (height and width):
◦ For a vertical formwork, provide two support cleats.
◦ For a horizontal formwork, a single strip may be sufficient. This avoids having to fix it in the ground.
– To find out the length of the support strips, measure the size of your pipes.
– Determine the dimensions of your formwork (depth, width, or height).
Necessary: leave a space between the cleats and the pipes: at least 1 cm.
Step 2. Install the support cleats
To install your support cleats :
– Locate the location of the cleats on the wall using the cleats or with a ruler.
– Draw a line with a pencil on the outside edge of the cleat.
– Check the horizontal or verticality with a spirit level.
– Pre-drill the cleats every 40 cm.
– Position them on the wall and mark the fixing holes on the wall by inserting a nail in the pre-drilling.
– Drill the wall and insert dowels of the appropriate size in the holes.
– Screw the cleats to the walls.
Tip: To ensure that the cleats match in the pre-drilled hole, mark the cleats and the wall with a number or letter.
Step 3. Cutting the formwork boards
– Cut the formwork boards to the measurements determined with a jigsaw.
– Make the cuts around the pipes.
It may be necessary to make cuts around the pipes, depending on your installation. For this purpose:
– Locate the size of the tubes to be recessed.
– Make a hole in the board with a hole saw or drill.
– Mark two parallel lines from the hole and saw.
Alternatively, use a plastic contour gauge:
– Place the gauge around the pipe and press it into the shape of the pipe.
– Place it on your board.
– Mark the contour of the pipe with a pencil.
– Cut out the board and check the cut by positioning it on the pipe.
3.1 Make an inspection hatch.
An inspection hatch is required for easy access to the shut-off valve and pipe junctions. You will do this using a screwed ventilation grid.
– Record the dimensions of the hatch on the relevant board using the grid.
– Drill a hole at the four corners of the layout.
– Cut out the location with a jigsaw.
– Screw on the grid.
Step 4. Screw the formwork boards to hide the pipes.
– Pre-drill the formwork boards every 20 to 30 cm and at x cm (x corresponding to the boards’ thickness) from the edge.
Case 1: horizontal formwork
– Screw the first plank onto its support strip by placing it against the wall.
– Screw the other board.
– Fasten the two panels together (face to face).
– Check the right angle with a square.
Case 2: Vertical formwork
– Screw the first form board (top board) onto its cleat.
– Apply the second board perpendicularly and screw it onto the first one.
Tip: If the second board has a support strip, screw it to the support strip before assembling the boards.
Step 5. Finishing touches

All finishes are possible:
– Painting :
◦ Before painting your formwork, coat the screw heads with wood paste or a coating that can be painted, as well as the wall/board and board/board junctions.
◦ Allow to dry and sand if necessary.
Important: if you wish to remove the formwork easily to access the entire pipe, it is advisable not to mask the screw heads and not make any joints.
Materials needed to hide pipes.
| Carpenter’s Square | Starting at $5 |
| Bubble Level | Starting at $4 |
| Plywood panel | $6 / m2 |
| Wood pulp | Approximately $5 |
| Drill | From $30 |
| Wood boards | According to species and dimensions |
| Ruler 60 cm | $10 approx. |
| Hole Saw | Starting at $30 (without the drill) |
| Hand Saw | Starting at $3 |
| Jigsaw | Starting at $30 |
| Spatula | From $1 |
| Grouting spatula | Approximately $2 |
| Cleats | Starting at $5 |
| Wood screws | About $15/lot of 200 |
| Screwdriver | Starting at $30 |


Pingback:5 Steps for Installing a Washbasin - Plumbers services