

5 Steps for Installing a Washbasin
Summary
– Step 1: Install the drain
– Step 2: Install the mixer tap
– Step 3: Install the waste system
– Step 4: Attach the washbasin
– Step 5: Connect to the water system
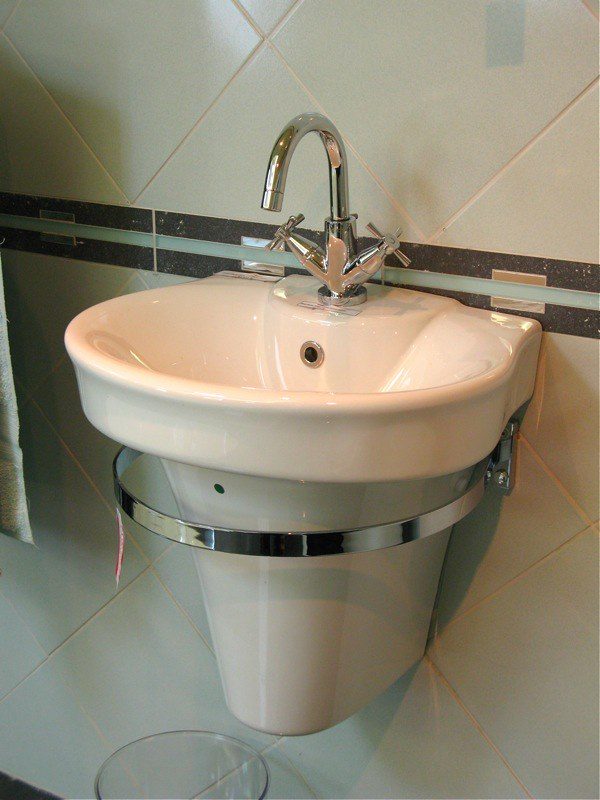
The washbasin, which comes in various shapes and hues, is an essential component of any bathroom. Installing a washbasin, whether free-standing or built-in, is very simple but more difficult for suspended models. Rigor and precision are then required for a successful installation.
Step 1: Install the drain.
– Turn off the water at the house’s main faucet.
– Since the washbasin is easily accessible, mainly its underside, take advantage of this to install the drain.
– Place the gasket over the hole in the washbasin.
– Place the grate over the gasket.
– Place the gasket on the other side (below the washbasin) on the part of the drain that includes the thread.
– Tighten the clamping ring by hand.
Tip: to reinforce the seal, put a bead of sanitary silicone sealant around the hole in the washbasin before placing the gasket.
Step 2: Install the mixer.
Before fixing the basin to the wall, it is better to install the mixer tap, as the clamping elements are much more accessible.
– Connect the water supply hoses to the mixer.
– Tighten by hand and then with a wrench.
– Screw the threaded rod by hand to the dedicated location and tighten with a flat screwdriver.
– Insert the drain valve into the hole at the back of the mixer and screw the bottom part of it in.
– Slide the base gasket and fitting over the pull tab and the two hoses as far as the stop on the mixer.
– Insert the hoses and the pull cord into the hole in the washbasin.
– From underneath the washbasin, install the gasket, the retaining flange, and the lock nut.
– Place the mixer properly on the washbasin, keeping it flat and aligned.
– Screw on the nut with a wrench while holding the mixer.
Step 3: Install the waste system.
Unscrew the lower part of the drain valve.
– Remove the ring screwed on the drain.
– Place the drain pin in the ring and screw it back onto the drain.
– Screw the lower part of the pull tab back onto the upper part.
– Connect the pull cord and the drain shaft with the connecting clevis.
– Tighten the screw of the connecting clevis with a screwdriver to block the whole.
– Insert the valve into the hole in the drain.
– Test the drain system by operating the pull tab on the back of the mixer.
– Adjust the connecting clevis if necessary with the screw.
Good to know: the connecting clevis should be slightly lower than the drain connection when the pull knob is in the closed position.
Step 4: Fix the washbasin.
A template is usually supplied with it to facilitate the installation of the washbasin.
– Place the template on the wall at the desired location.
– Check that it is horizontal using a spirit level.
– Mark the mounting points with a pencil.
– Drill at the location of the markings with a drill bit adapted to the size of the chosen plugs.
– Insert in the holes, plugs adapted to the nature of your wall (hollow or solid partition…).
– Screw the threaded rods (supplied) into the plugs with a wrench.
– Screw the nuts on the threaded rods with a flat wrench.
Step 5: Connect to the water circuit.
– Screw the hoses of the mixing valve onto the water inlets, making sure that the hot and cold directions are matched. Tighten by hand and then with a wrench.
– Connect the washbasin trap to the drain.
– Turn on the water supply at the main tap.
– Check for leaks.
Materials needed to install a washbasin.
| Dowels | From $1 for 25 |
| Wrench | From $2 onwards |
| Flat wrench | $2 approximately |
| Pencil | $0,50 for a pencil |
| Spirit level | From $4 onwards |
| Drill | From $30 onwards |
| Flat screwdriver | From $1 onwards |
Read more:
Amateur Plumbers: How to Hide Pipes;
Pipes and Wrenches | Installing a Shower Tray;
How to Repair the Joints of a Leaking Faucet?


