

It is a common question most homeowners have in mind.
It is always critical to guarantee your safety by determining whether your home, business, or workplace is properly earthed. So, let’s see how to.
Experimenting With A Lightbulb

Insert A 100-watt Light Bulb Into A Base Socket
Look for a regular lightbulb with a 100-watt rating. Then, look for a solitary base socket to put your lightbulb into at your local hardware shop. Choose one with two wires already attached so you don’t have to use your own. Insert the lightbulb end into the socket and turn it clockwise to fasten it to the base.
Make certain that the socket base is designed for usage with 100-watt lightbulbs. The test may fail if the power rating is too powerful or too low.
Remove 12 Inches (1.3 Cm) From The End Of Each Wire At The Base
Using a pair of wire strippers, find the corresponding gauge for the wire on the base. Squeeze one of the wires in the slot such that it protrudes about 12 inches (1.3 cm) from the other side. Pulling the wire gently toward you will allow you to cut through the insulation and remove it, revealing the circuitry. Repeat on the other side of the base for the second wire.
Insert The Base’s Wires Into The Live And Neutral Ports Of An Outlet
Push the exposed end of either wire attached to the base into the live port on your outlet, which is generally the larger and longer slot. Then, on the base, insert the second wire into the neutral slot, which is the smaller port adjacent to the live one. If your outlet is operating properly, the lighting will switch on instantly.
If the outlet you’re checking isn’t powered, the light won’t turn on.
Connect The Wires To The Live And Earthing Ports To Test If The Lamp Illuminates
To begin, remove both cables from their respective ports. Place one of the wires in the earthing port, which is the third hole on the top or bottom of your outlet. Reconnect the second wire to the live port and check to see whether the lamp glows. The outlet has been properly earthed if the lightbulb has the same intensity as the previous test. The outlet is not earthed if the light does not turn on at all.
If the light is weaker than it was in your initial test, your outlet has earthing, but it may be defective. To determine the root of the problem, hire an electrician to evaluate your electrical system.
Using a Multimeter to Check Earthing
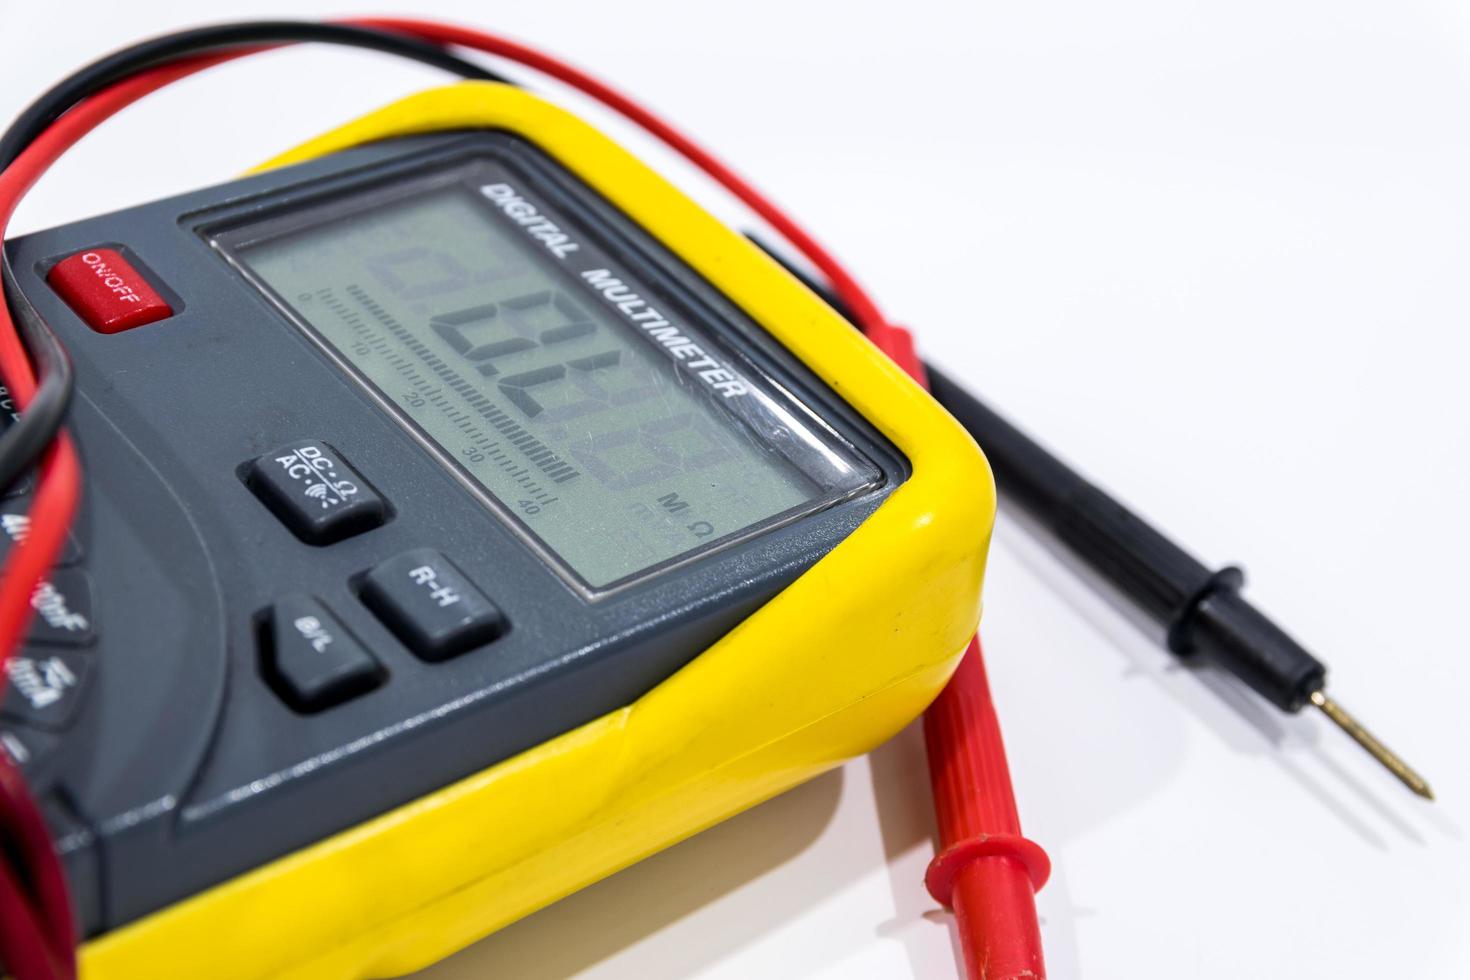
Set A Multimeter To Measure The Alternating Current Voltage
Multimeters can measure voltage, current, and resistance in a variety of electrical components. If you have an analog multimeter, set the dial to the letter “V” with wavy lines next to it for AC power. If you have a digital multimeter, use the buttons to cycle through the settings until you reach AC voltage. To achieve an accurate reading, use the highest cutoff value for the voltage on the meter.
Connect The Red And Black Leads To The Multimeter’s Corresponding Ports
Take a reading while the leads are connected to an outlet’s live and neutral ports.
When the leads are connected to the live and earthing ports, measure the voltage.
Check The Voltage Between The Outlet’s Neutral And Earthing Ports
To test the reading, insert the red lead into the neutral slot and the black lead into the earthing port. The volts displayed on the multimeter will be insignificant in comparison to the other readings you’ve recorded. Make a note of the third reading so you know how much power is flowing between the ports.
Check To Determine Whether The Overall Leakage On Your Outlet Is Less Than 2 V
The quantity of volts that move from your earthing port to the outlet is referred to as leakage. Subtract the first (live to neutral) reading from the second (live to earthing). After you’ve figured that out, add the number of volts from your third reading (neutral to earthing). If the value is larger than 2 V, your earthing may be defective. Otherwise, the outlet is perfectly safe to use.


