

Summary
– Step 1: Connect the faucet to the water supply
– Case 1: Connection with a U.S. gasket fitting or a glued fitting
– Case 2: Connection with nut
– Step 2: Connect the faucet to the bunghole.
– Step 3: Check the installation
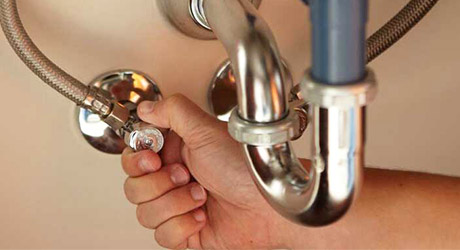
With flexible screw-on connections, connecting a valve is a quick and easy procedure. Besides, the material needed to join a valve is readily available on the market.
If your installation’s supply pipes are not equipped with a connection system, you will have to place a two-way (also called instantaneous) coupling at their end. This fitting should be selected to match the copper supply pipe’s diameter on one side and the screw-in hose on the other.
Materials for connecting a tap
– Double cone fitting
– Wrench
– Silicone grease
1. Connect the faucet to the water supply
To install the biconical fittings on the copper supply pipe and the hose, you have the choice between :
– a connection with a so-called American joint fitting (also known as a grip fitting) ;
– a connection with a nut.
Note: the cold water pipes on the right and the hot water pipes are on the left.
Case 1: Connection with a U.S. gasket, or “grip” fitting
The American gasket fitting offers an optimal seal and is removable. It is equipped with a toothed metal ring that will hold the nut’s seal and the bicone fitting.
– Grease the ring of the nut with silicone grease.
– Thread the nut, the ring (with its teeth pointing towards the end of the tube), and the seal onto the feed tube.
– Then, install the fitting on the end of the line.
– Tighten the nut on the two-cone fitting to crush the ring and ensure a tight seal on the fitting.
– Do the same thing on the hose side to ensure the connection with the supply tube.
Important: Observe the assembly sequence described above. Also, ensure the metal washer’s teeth are pointing towards the end of the tube because these teeth will seal the assembly.
Case 2: Connection with nut
A brass ring will guarantee the tightness between the nut and the bicone fitting.
To connect the hoses to the water inlet pipes:
– Thread the nut onto the supply pipe.
– Then, thread the fitting onto the end of the tube.
– Tighten the nut: the brass should press against the fitting to ensure a tight seal.
– Do the same on the hose side to make a connection with the supply tube.
2. Connect the tap to the bung.
Once you have made the valve connections, you must connect the valve to the bung through a control rod.
– Inside the valve body, insert the bung control stem and screw the lower stem in place.
– Then, insert the lower end of the stem into the ball joint.
– Adjust the size of the bung valve. The plug should be able to close entirely and open sufficiently.
– Tighten the screw.
3. Check the installation
It is strongly advised to check that you have correctly connected your faucet.
– Run the water, boiling water.
– Run the palm of your hand over the pipes and fittings to check for moisture or leaks.
– Check that the water drains typically through the bunghole.
– If there is a leak, disassemble the fittings and repeat the process.
To improve the faucet connections’ tightness, you can use silicone grease to coat the screw threads.
Now you know how to connect a faucet. Hopefully, this will help you.
You can read more here:
All About Gas Line Installation Standards
How to Repair a Leaking Faucet
How to Choose Your Plumbing Fittings
The Use of Isolation Valve in Plumbing
Don’t forget to share this post and leave your comments in the section below.


