

Summary
– Overview of the WC connection
– Step 1: Prepare the exhaust connection
– Step 2: Connect the drain to the toilet.
– Step 3: Install the toilet stopcock (shut-off valve)
The traditional toilet consists of a bowl on the floor, and for it to be functional, it is necessary to make the connections for the evacuation and the water inlet that feeds the flush.
This post provides you with a useful guide to connect your WC correctly to avoid unpleasant surprises during use.
Overview of the WC connection
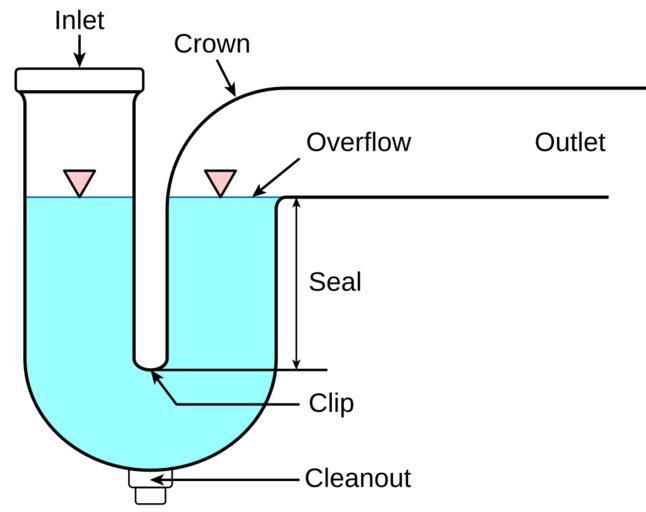
Evacuation
The drain, located at the back of the toilet, is connected directly to the waterfall.
– The chute is a vertical tube Ø 100, which serves the other evacuations of the floor. A special connector (panty) is positioned on the chute to connect all the drains (WC, bathtub, shower, etc.). It can have several inlets of different diameters.

– The connection of the WC to the waterfall is made with a WC pipe. It is an elbowed piece, Ø 90, 100, or 110, with a gasket to ensure the tightness of the fitting at the toilet outlet.
– Depending on the distance between the toilet bowl and the chute, a pipe section can be added between the pipe and the chute.
Good to know: The connecting pipe between the bowl and the chute should have a slope of 2 to 5 cm/m. If it is not possible to ensure this minimum slope (pipe too long), the connection must be made on the lower floor, passing through the storey floor.
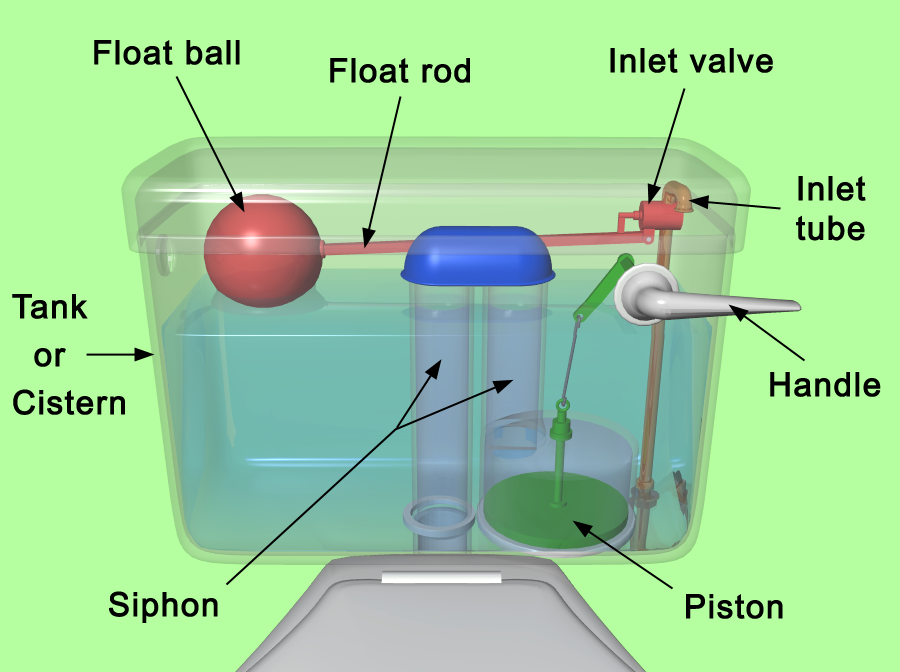
The water inlet
The water tank is attached to the back of the bowl.
– The tank is connected to a water inlet on the side.
– This inlet, usually made of copper Ø 10/12, leads to a shut-off valve mounted at the tank’s inlet.
Materials required for connecting a WC
|
Alcohol |
$3 approximately |
|
Flat wrench |
$2 approx. |
|
Glue for PVC |
6 $/kg |
|
Cutter |
$3 approx. |
|
Tape Measure |
Starting at $4 |
|
Hacksaw |
Starting at $15 |
Step 1. Prepare the drain connection
– Place the cuvette in the intended location.
– Locate the connection point on the chute: standby line or corresponding hole on the pan.
– Measure the distance between the outlet at the back of the toilet and the connection point.
– Depending on the length and height to be covered, choose the appropriate pipe and any additional elements.
◦ The pipe can be short, long, angled, straight, etc. There are also expandable and flexible pipes available, which make it easy to adapt to different configurations.
◦ If necessary, to obtain a sufficient discharge length, insert an intermediate pipe with a female-female socket of the appropriate diameter. A second sleeve may be required on the fall side.
Good to know: When the connection is problematic (e.g. alignment), instead of gluing a female sleeve on the pipe on the pipe side, use a WC sleeve. The end of the pipe is engaged in it without gluing (a gasket ensures a tight seal).
– Pipe or pipe, make the cuts with a hacksaw or fine-toothed hacksaw.
– Then deburr with a cutter or half-round file.
Step 2. Connect the drain to the toilet
– Do a dry installation to make sure it fits properly.
◦ Present the pipe (shortened if necessary) at the outlet of the bowl.
◦ If necessary, place the socket (or WC sleeve) and the intermediate pipe.
◦ Insert the last element (pipe, pipe, or second sleeve) on the chute or in the appropriate hole of the panty.
Good to know: This step is essential because once the elements are glued together, grinding is no longer possible.
– Remove the pipe and the different elements to be placed.
– Clean the contact surfaces with methylated spirits.
– Glue and assemble them.
Step 3. Install the WC shut-off valve
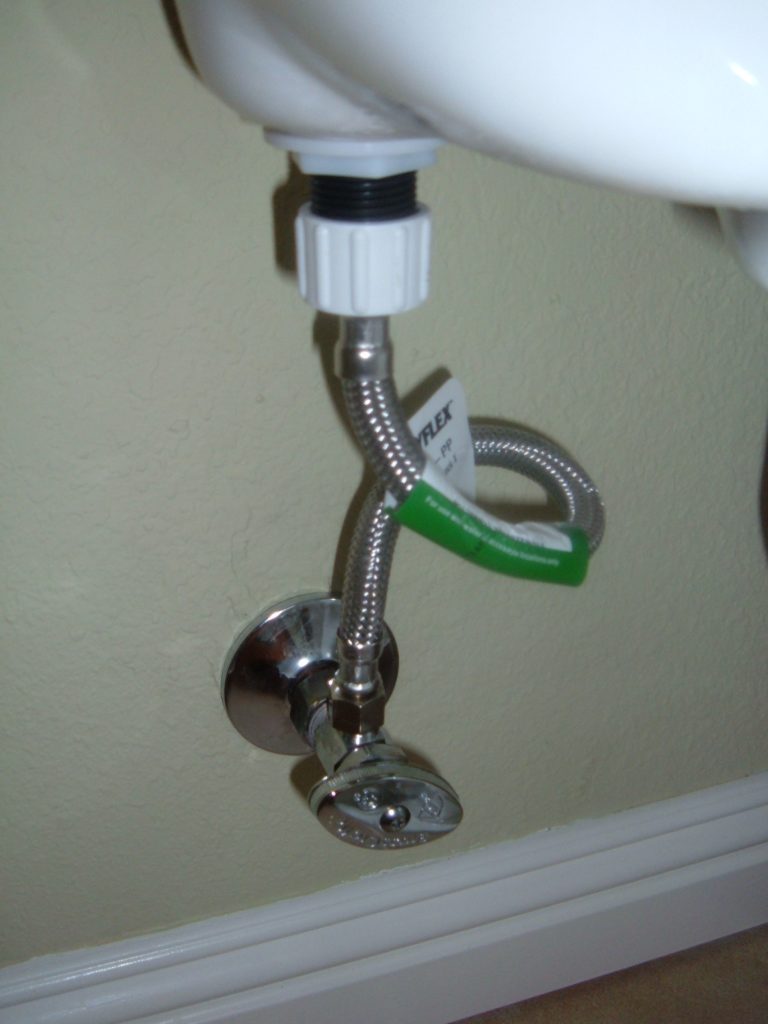
– Install a new gasket at the inlet and outlet of the faucet :
◦ a gasket at the bottom of the nut on the water inlet side ;
◦ another gasket in the nut of the faucet on the tank side.
– Screw the faucet on the tank side first.
– Then screw it on the water inlet side.
– Tighten the nuts with a wrench.
Please let us know below how you have been able to proceed with the installation of your WC.


