

In the heart of every home’s electrical system lies the humble fuse, a critical component designed to protect your circuits from overload. When a fuse blows, it can bring part of your home to a standstill. But not to worry, y’all—replacing a blown fuse is a straightforward task if you follow the right safety procedures. This guide will walk you through the process step by step, ensuring you get your lights back on without any fuss.
Understanding Fuses and Their Function
Before we dive into the replacement process, let’s get a quick rundown on what a fuse does. Essentially, a fuse is a safety device that prevents electrical overload and potential fires by “blowing” or breaking the circuit when the current exceeds a safe level. It’s a one-time use device, meaning once it blows, you’ll need to replace it to restore function to the circuit.
Identifying a Blown Fuse
First things first, you need to identify the culprit. A blown fuse is usually easy to spot in your fuse box; it might show signs of damage such as a melted wire, discoloration, or even glass that’s cloudy or has a visible break in the wire.
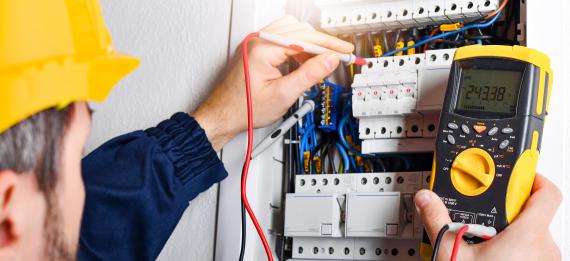
Safety Precautions
Safety is paramount when dealing with electricity. Turn off the main power supply to your home before attempting to replace a fuse. This might seem inconvenient, but it’s crucial for preventing electric shocks. Always use insulated tools and wear rubber-soled shoes for extra protection.
Step-by-Step Guide to Replacing a Fuse
- Locate Your Fuse Box: This is typically found in basements, garages, or utility rooms.
- Identify the Blown Fuse: Look for signs of damage or discoloration.
- Turn Off the Main Power: This is non-negotiable, folks. Safety first.
- Remove the Blown Fuse: Unscrew the fuse by turning it counterclockwise. If it’s a cartridge fuse, you might need a fuse puller.
- Inspect and Clean the Holder: Check the fuse holder for any signs of damage or corrosion. Give it a quick clean to ensure a good connection.
- Insert the New Fuse: Screw in a new fuse that matches the amperage rating of the blown one. Never, and I mean never, use a higher amperage fuse as a replacement.
- Power Back On: Once the new fuse is securely in place, turn the main power back on.
- Check Your Work: Turn on the switches and appliances associated with the circuit to ensure everything is working correctly.
Troubleshooting Common Issues
If the new fuse blows shortly after replacement, you might be dealing with an overloaded circuit or a more severe electrical problem. In such cases, it’s best to consult with a professional electrician. Don’t keep replacing the fuse, hoping for a different outcome—that’s just asking for trouble.
The Final Spark
Replacing a blown fuse is a task most homeowners can handle with a bit of knowledge and the right precautions. However, remember that fuses blow for a reason, often pointing to underlying issues with your electrical system. Regular maintenance and inspections by qualified professionals can help prevent these problems and keep your home safe.
Remember, when in doubt, reach out to a professional. It’s better to be safe than sorry, especially when it comes to electrical repairs. Your home’s electrical safety is not something to take lightly, so take these tips to heart, and you’ll be well on your way to becoming a fuse-replacing expert.
Hope y’all found this guide handy and informative. Stay safe and keep those circuits protected. Feel free to drop any questions or share your fuse-replacing adventures in the comments below. Let’s keep our homes safe and sound, one fuse at a time.

