
Summary:
– Water supply in the bathroom: what to check
– Water supply in the bathroom: how to change them
– Bathroom sewage disposal: what to check
– Getting the work done
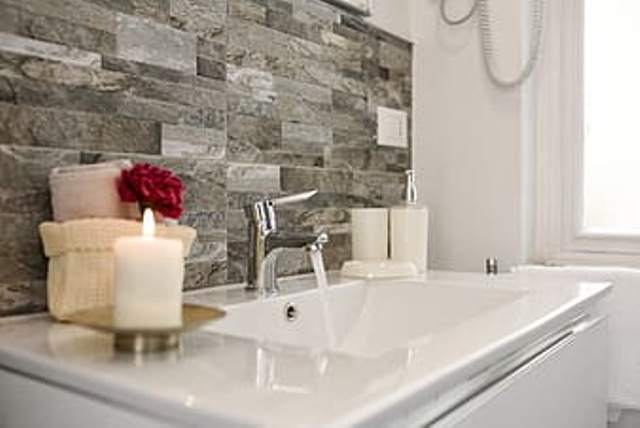
There is no point in having a nice tap or a nice shower without water, or without being able to drain it! Water supply and drainage in a bathroom are therefore essential elements to take into account, whether you are renovating an existing room or creating a new one from scratch.
Water supply in the bathroom: what to check
General installation
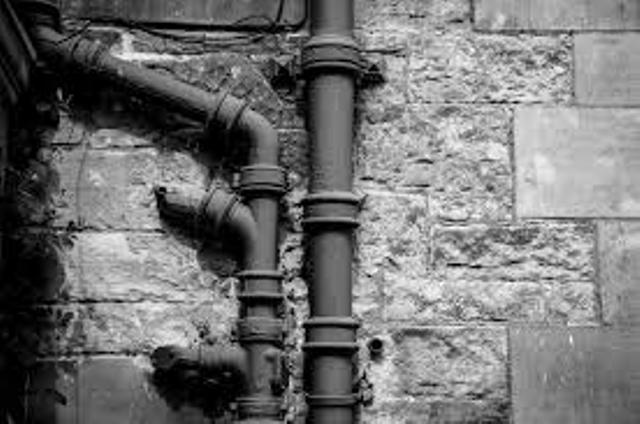
It all starts at the main sewer where all the pipes in the house are connected. Before the first branch line, just after the meter, a non-return valve must be installed. Its job is to control the direction of the water so that the domestic installation does not backflow into the main pipe.
Each water inlet pipe must be fitted with an easily accessible stop valve to cut off the water, for example in the event of a leak. This shut-off valve is often combined with a trap to empty a section of the pipe.
Water pressure
Too much pressure can damage pipes and plumbing fixtures. If you experience these so-called “water hammer”, it is recommended to install a pressure reducer after the meter and the non-return valve. You will be able to choose between a constant pressure model, which ensures a regular and fixed pressure, and an adjustable model with a manometer to select the pressure.
Conversely, the water pressure may be insufficient. If it is less than 0.3 bar at the tap that has the least pressure, you will need to install a booster after the meter and the non-return valve. It is up to you to choose a model with or without a storage tank (which means that the pump will not start automatically when there is a small flow of water or in the event of a leak), whose capacity and flow rate will be adapted to your daily water consumption.
Water supply in the bathroom: how to modify them
As the water inlet pipe is pressurised, it can be extended, moved up and down to sit wherever you like in the bathroom, preferably under the washbasin. Although any modification of these pipes requires patience and rigour, you can carry out the repairs and maintenance if you are a good DIY enthusiast.
The necessary equipment
For pipes, you may prefer a material such as PER (cross-linked polyethylene) to copper, whose use requires a great deal of control. In addition to these pipes, brass fittings, elbows, T’s, reducers, hoses, Teflon, and a shut-off valve can be used. But also pliers to cut the PER, a drill, a hammer, a screwdriver and wrenches.
Note: the minimum diameter of the PER pipe depends on the sanitary fittings to be connected: 10 mm for a washbasin, 12 for a shower, 13 for a bathtub. More generally, it is advisable to opt for 12 for the former, 16 for the shower and bathtub.
The main steps
Start by accurately measuring the required pipe lengths, as well as the number of fittings, elbows, T’s, hoses…
Good to know: In a bathroom, you need one hot and one cold water inlet for the bathtub, the same for the shower and the sink, and only one cold water inlet for the toilet. If you are connecting to existing pipes, check their diameter carefully.
Then make sure to turn off the water in the bathroom before starting the work by following these step-by-step instructions:
Wastewater drainage in the bathroom: What to check
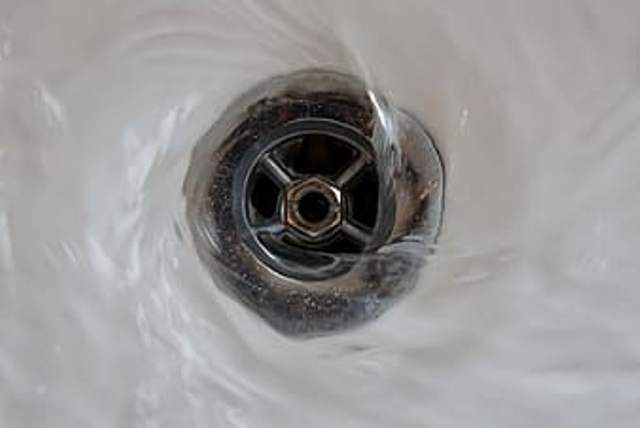
If the water in the inlet pipe is under pressure (allowing it to rise and fall at will), the wastewater flows naturally in the outlet pipe. Therefore, to avoid stagnation, it needs a minimum slope of 2%.
Note: If the waste water and the debris it contains are not properly drained, they will create blockages, damage the piping system, and cause bad odours and leaks.
The sink or washbasin, when placed high up, can therefore mechanically move away from the drain to which it will be connected. But the shower and bathtub, which are closer to the floor, will have to be placed as close as possible to the column to respect the slope. If this is not possible, you will have the possibility:
– To create a platform for your sanitary facilities, which will also make it possible to hide all the piping;
– To raise the entire bathroom floor;
– Or opt for a lifting pump, which takes the form of a motor that pressurizes the waste water and carries it to the standpipe.
Each sanitary unit must have its own pipe
Each sanitary unit must be connected to its own waste water drainage pipe. And not all of them will have the same diameter.
– For toilets, the diameter of the sewage pipe must be between 100 and 125 mm. If it already exists and has an insufficient diameter, or if the slope is insufficient, you can opt for a macerating WC, which can be laid on a pipe with a diameter of up to 22 mm.
– For a washbasin or washbasin, the diameter of the waste water drainage pipe (longer than 1 m) must be at least 40 mm, compared to a minimum of 50 mm for the bathtub and shower.
Note: Only a very experienced DIY enthusiast will set up a waste water drainage system. If you are not sure, it is best to call in a professional.
Getting the work done
Nothing beats a professional to study the feasibility of your bathroom project. You will also have the certainty that the work will be carried out in accordance with standards and in the shortest possible time, which is essential for a room like the bathroom.
Tip: if the plumber you are thinking of hiring has a website, consult his achievements and check his references. Also, don’t hesitate to ask your acquaintances for advice, they may be able to recommend a professional in your region. Nothing beats word of mouth! Also, make sure that the plumber you choose is accredited so that there is no fooling around invisible costs.


Pingback:Is It Time to Change Your Water Heater (Part 2) - Plumbers services